Tampilkan postingan dengan label Windows. Tampilkan semua postingan

How to change the display control panel in Windows 7

There is a story that when I become a computer technician at a small company near my area, when I freelance at government offices, I saw people in the office have a problem that it is very confusing his head, that he wants to remove the program on the system operation but the obstacles, he confused the control panel on the computer is a bit strange.

On this occasion I will discuss how to change the display control panel in Windows 7. First of all, open the control panel by typing the "Wondows" and click "Control Panel".

Then, the control panel window will appear on your computer.

The next step, point your cursor at the top-right corner, click on "Large Icon" or "Small Icon" and change its mode into "Category".
Well, you now control panel window has changed and become easy.

How to accelerate the performance of Windows 7 without using the software


In this post, I will discuss a little knowledge I learned from friends and almost like my own brother, namely black-draco. Many lessons on computer science, especially the windows, because I am very confused use windows, unlike linux. Okay, on this occasion, I will discuss how one way to accelerate the performance of Windows 7 without using the software, you curious? Immediately follow this tutorial!

First of all, you have to open the window "Run" by typing the "Windows + R" simultaneously. And insert the words "% temp%" to open the temporary folder on the system partition windows.

Press "Ctrl + A" to select all files and folders, then type "Ctrl + alt + delete 'to permanently delete all the files and folders in the directory / folder temp.

If files and folders are not deleted permanently, then the files and folders are stored in the "Recycle Bin".

Open the "Recycle Bin" with a double-click, and then will pop up window. Then select it and click the "Empty the Recycle Bin" to delete the files and folders that had not erased permanently.

Well, at this stage, everything is finished, now let's see the startup process on your computer!

How to Turn Off Autoplay on Your USB Stick


Meet again with me, this time I'll post a little more tutorial because I want to spend my time on my blog which is extremely crazy. At this post I will discuss just a little and not too much, namely how to turn off autoplay on your USB stick. Instead of too much talk, the better a lot of action.

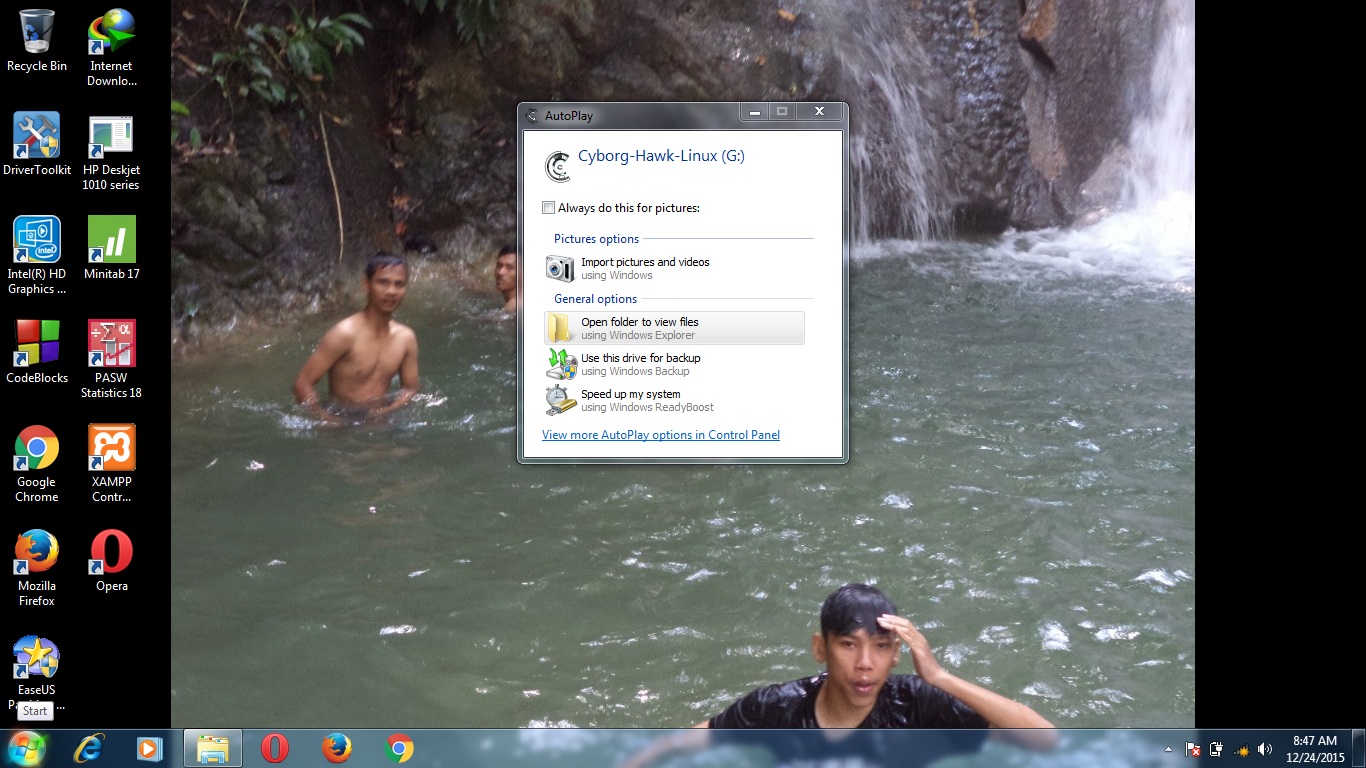
First of all, insert your USB stick on your laptop or your PC, then you will see the autoplay as shown below.

Then, at the window at the bottom it says "View more AutoPlay options in Control Panel", click on that section! then will mulcul new window as shown below.

Then, the next step is uncheck Doodles on "Use AutoPlay for all media and devices" like the picture above, then the last step, click "Save" at the bottom right corner, Done.

How to Install The Wireless USB TP-LINK TL-WN727N Type


Welcome to return, some of this week, lately, I am very busy in living my final exams on campus, so on this occasion I will be posting some of the posts. On this occasion I will discuss the tutorial how to install the Wireless USB TP-LINK TL-WN727N type. You are curious and impatient? Check it out!

First of all, you have to insert the driver CD into the CD-ROOM, then plug its USB TP-LINK to your computer! Wait a few minutes will appear command for running autorun driver you have installed earlier. Click on "Run Autorun.exe" to run the application drivers!


The second step, find the model TL-WN727N and select "Install Driver & Utility"

This will bring up a window installation. Click "Next" to continue!

Select "Install TP-LINK Wireless Configuration Utility and Driver" and then click "Next".

Select the "Change" to specify the folder in the heading for the installation or you can leave it to the standard default settings. Click "Next" to continue!

Click "install" to install the drivers and utilities for your adapter.

The installation will take a little time, then you can wait a few minutes.

If the window to finish it appears, then click "Finish" to complete setup. Well, at this stage of the installation has been completed and the TP-LINK Wireless USB can already be used.


Restoring files and folders are hidden by Virus

   Good morning my friend! this time I want to share problems and challenges I have ever faced in my place of work, and associated just my friend also shared problems like this in the "facebook" well, rather than just me who can benefit, better I also share to friends all that my knowledge and reward alms jariah that my friend can also be useful for us,.! Okay, immediately wrote ya! like this tutorial!
  • Open CMD  (push start+R button) and than type on the box and run   "cmd" (without quote)
  • Go to the directory where the file / folder is missing! example to my case in disk F, type "F:"  (without the quotes)
  • The last step, type this command " attrib -s -r -h /s /d" (without the quotes) 
  • Done , and check with push "dir" (without the quotes)
  • Files that are hidden by the virus will reappear

Note this Attrib so can hide the file/directory. The command is, "attrib nama_file +s +r +h"
example : "attrib film18 +s +r +h", "attrib -s -r -h /s /d".
Oke, The only knowledge that can be ane share to friends all! Hope it is useful!


(giat-giat lah anda belajar!)

membuat file kosong dengan kapasitas memory 1000GB